
Your kitchen cabinets set the tone for the entire room, and painting them is one of the smartest updates you can make without the cost and disruption of a full remodel. But a successful cabinet painting project in Naples requires more than a trip to the paint store and a free weekend.
This guide walks you through each step so you know what to expect, what decisions you need to make, and how to get a finish that looks factory-smooth and lasts for years in the Florida climate.
Decide Whether to DIY or Hire a Professional
Cabinet painting looks simple until you start. The job requires removing all the doors and hardware, degreasing every surface, sanding to give the paint something to grip, priming, spraying or carefully brushing multiple coats, and reassembling everything without smudges or fingerprints.
If you have the time, the tools, and a space to work where overspray and dust won’t be a problem, you can tackle this yourself. Most homeowners find that hiring a crew saves them days of work and delivers a much smoother finish. A professional spray setup leaves no brush marks, and experienced painters know how to handle the humidity that can ruin a fresh coat of paint in Southwest Florida.
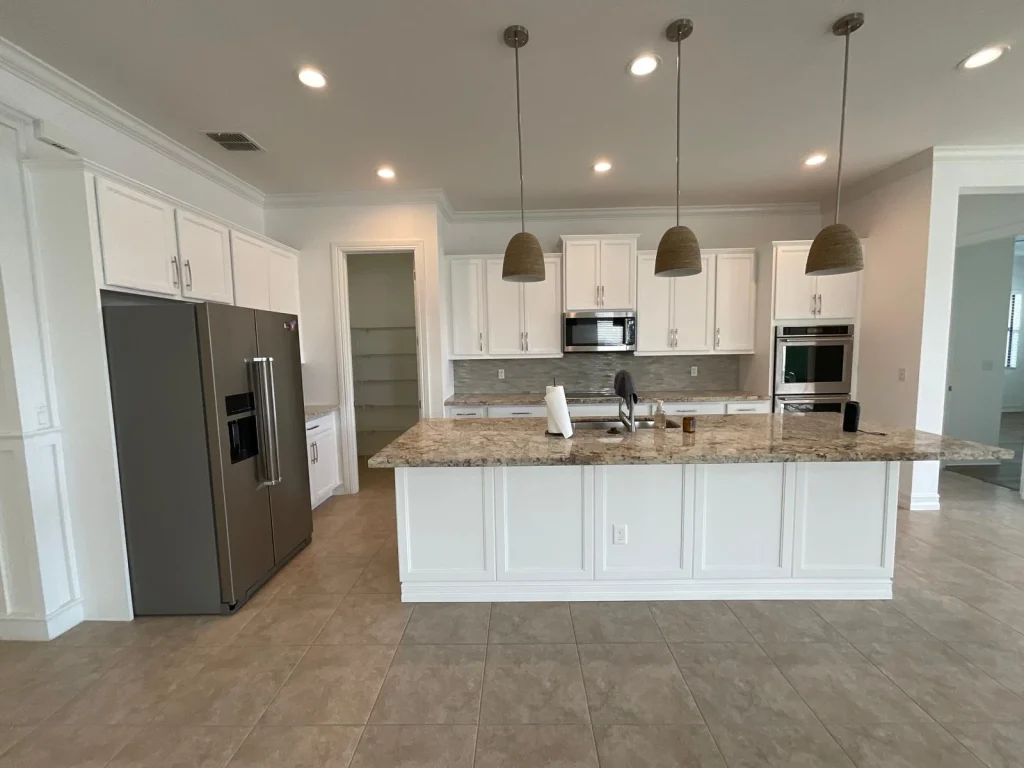
Choose Your Cabinet Color and Finish
Color changes the whole feeling of your kitchen. White and off-white cabinets open up the space and make it feel larger. Gray tones give you a modern look that works with almost any countertop. Navy, forest green, and charcoal add drama if you have good natural light.
Think about your countertops, backsplash, and flooring when you pick a shade. Bring home large paint samples and tape them to your cabinet doors in different light. What looks perfect at noon might feel too stark in the evening or too warm in morning sun.
Finish matters as much as color. A satin or semi-gloss sheen cleans easily and shows fewer fingerprints than flat paint. High-gloss looks sleek but highlights every imperfection in the wood. Most kitchens do best with a satin finish that balances durability and appearance.
Plan Your Kitchen Timeline and Living Space
Your kitchen will be out of service for several days. Cabinet doors come off first, then boxes get prepped and painted. Doors are sprayed separately so they dry without dust settling on them. The whole process usually takes three to five days depending on the size of your kitchen and how many coats the color needs.
Set up a temporary kitchen in another room before work begins. You will need a microwave, a coffee maker, paper plates, and access to your refrigerator if it stays in place. Plan simple meals that do not require much prep. If your refrigerator needs to be moved or unplugged, stock a cooler with essentials.
Coordinate the project around your schedule. Do not plan to host guests or cook a big meal during the work. If you work from home, expect noise from sanders and sprayers during the day.
Prepare Your Cabinets for Painting
Preparation is what separates a finish that lasts from one that chips in six months. Every surface must be clean, dull, and ready for primer. Grease from cooking builds up on cabinets, especially near the stove, and paint will not stick to it.
All hardware gets removed and labeled so it goes back in the right spot. Hinges can be reused or replaced. If you want new knobs or pulls, buy them before painting starts so you can drill new holes if the spacing changes.
Doors are taken off and brought to a clean workspace for sanding. Cabinet boxes stay in place and get the same treatment. Any dents, scratches, or holes are filled and sanded smooth. Then everything is wiped down to remove dust before primer goes on.
Understand the Painting Process
Primer is the foundation. It seals the wood, covers stains, and gives the topcoat something to bond to. Some primers block tannins that can bleed through light colors. Skipping primer or using the wrong type is the most common mistake in a cabinet painting job.
Once primer dries, the first color coat goes on. Most projects need at least two finish coats for full coverage and durability. Dark colors going over light wood may need three. Each coat must dry completely before the next one is applied, and humidity slows drying time.
Spraying delivers the smoothest finish because it lays down an even film without brush marks. Doors are sprayed flat so paint does not sag or drip. Cabinet boxes are sprayed or brushed carefully depending on the space and the ventilation.
After the final coat cures, doors are reinstalled and hardware goes back on. Drawers are adjusted so they glide smoothly. The whole kitchen gets a final cleaning so you can start using it right away.
Consider the Factors That Affect Your Investment
Several things determine what a cabinet painting project will cost you. The size of your kitchen and the number of doors and drawers are the biggest factors. A galley kitchen with twelve doors takes less time and material than an open kitchen with thirty doors and a large island.
The condition of your cabinets also matters. If they need repairs, extra sanding, or a stain-blocking primer, that adds time. Intricate door styles with raised panels or grooves take longer to prep and paint than flat slab doors.
Your color choice affects the price too. Going from dark stained wood to white requires more primer and more finish coats than refreshing cabinets that are already a light color. The type of paint and the finish you choose will also influence the final number.
We provide free estimates for every painting project in Naples so you know what to expect before you commit. That estimate covers all labor, materials, prep work, and cleanup.
Maintain Your Newly Painted Cabinets
Painted cabinets need a little care to stay looking fresh. Wipe up spills and splatters as soon as they happen. Grease and acidic foods can dull or stain the finish if they sit too long.
Use a damp microfiber cloth for regular cleaning. Avoid abrasive scrubbers and harsh chemicals that can scratch or dull the paint. A drop of dish soap in warm water is enough for most messes.
Check your cabinets every few months for chips or wear, especially around handles and hinges where hands touch the most. Small touch-ups are easy if you keep a little leftover paint. Larger damage may need sanding and a fresh coat.
Frequently Asked Questions
How long does painted cabinet finish last?
With proper prep and quality materials, painted cabinets can look great for seven to ten years or more. The finish holds up best when the surfaces were degreased and sanded correctly before painting and when you clean them gently. High-traffic areas like doors near the sink may show wear sooner.
Can all cabinet materials be painted?
Most cabinets can be painted, including wood, wood veneer, and laminate. Laminate and glossy surfaces need special primer so the paint bonds. Cabinets that are peeling, warping, or heavily damaged may not be good candidates. A contractor can inspect your cabinets and tell you if painting makes sense or if replacement is a better option.
Will painting cabinets make my kitchen smell?
Some smell is normal during any painting project, but it fades quickly when the space is well ventilated. Water-based paints have less odor than oil-based products. Opening windows, running fans, and keeping the HVAC running help the smell dissipate faster. Most kitchens smell normal again within a day or two after the final coat.
Start Your Cabinet Painting Project in Naples
A freshly painted kitchen changes your whole home. Swfl painting services llc has helped families across Southwest Florida update their cabinets with careful prep, smooth finishes, and attention to detail. Our family crew handles every step, from degreasing and sanding to the final coat and hardware reinstall.
We serve homeowners in Naples and throughout the region. If you are ready to transform your kitchen, call us at 2392388636 or visit our contact page to request a free estimate. We will walk you through the process and answer your questions so you know exactly what to expect.